
How to Create Groups as a Community Admin
How to Create Groups as a Community Admin
Groups are dedicated spaces within your community where community members can come together around shared causes or interests — whether it’s volunteering, sustainability, DEI, or any initiative your team cares about.
They help:
- Spark collaboration around meaningful impact.
- Empower members to lead and participate in causes they’re passionate about.
- Make your community feel more personal, organized, and action-oriented.
And the best part? You can create as many groups as your community needs.
Steps to Create a Group
Step 1. Log in to your community at https://my.neki.io
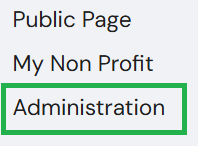
Step 2. Click on “Administration” on the right panel.
For Mobile:
On the Home page, tap ‘Admin’ in the bottom navigation bar.

Click this icon to open the menu and see additional options

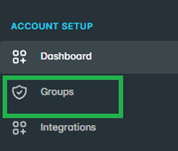
Step 3. From the left-hand navigation menu, click on “Groups.”
Step 4: You’ll see a button to “Add” Click it to get started.
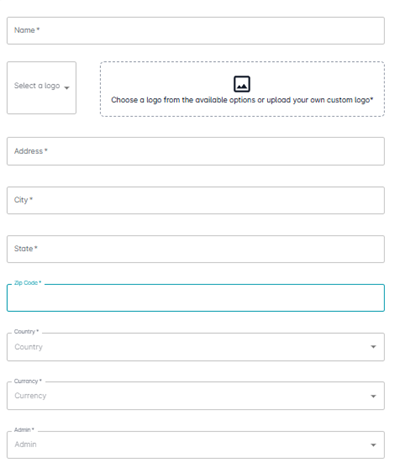
Step 5: Fill in the group details and save it.
Here’s what you’ll need:

- Group Name (e.g., Climate Champions, Volunteer Circle, Women in Tech)
- Logo or Image (Helps give the group its own identity)
- Group Admin – Choose from existing members in your community
Your Group creation process is complete
What happens next?
1. An email goes out to you (Community Admin) and the Group Admin with key next steps and actionable items.
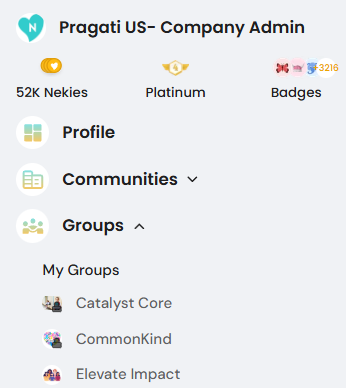
2. The group becomes visible on the community homepage under the ‘Groups’ section.

For Mobile:
On Home Page, Click on Profile Picture.
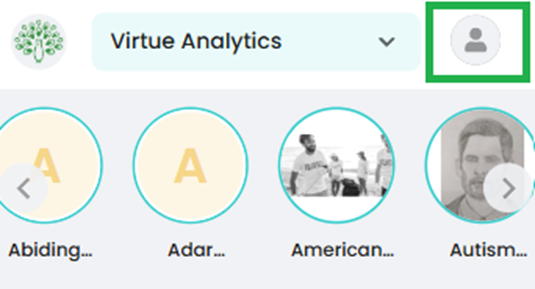
Groups will be visible under 'Groups'
3. The Group Admin gets access to manage the group, invite members, share updates, and plan activities.
Who can join?
Group members can only be added by invite. This keeps the space focused and ensures the right people are involved.
Need help?
Reach out to our team anytime at help@neki.io